Hello, everyone.
Thank you for buying this asset.
This page will provide a brief explanation of how to use this asset here.
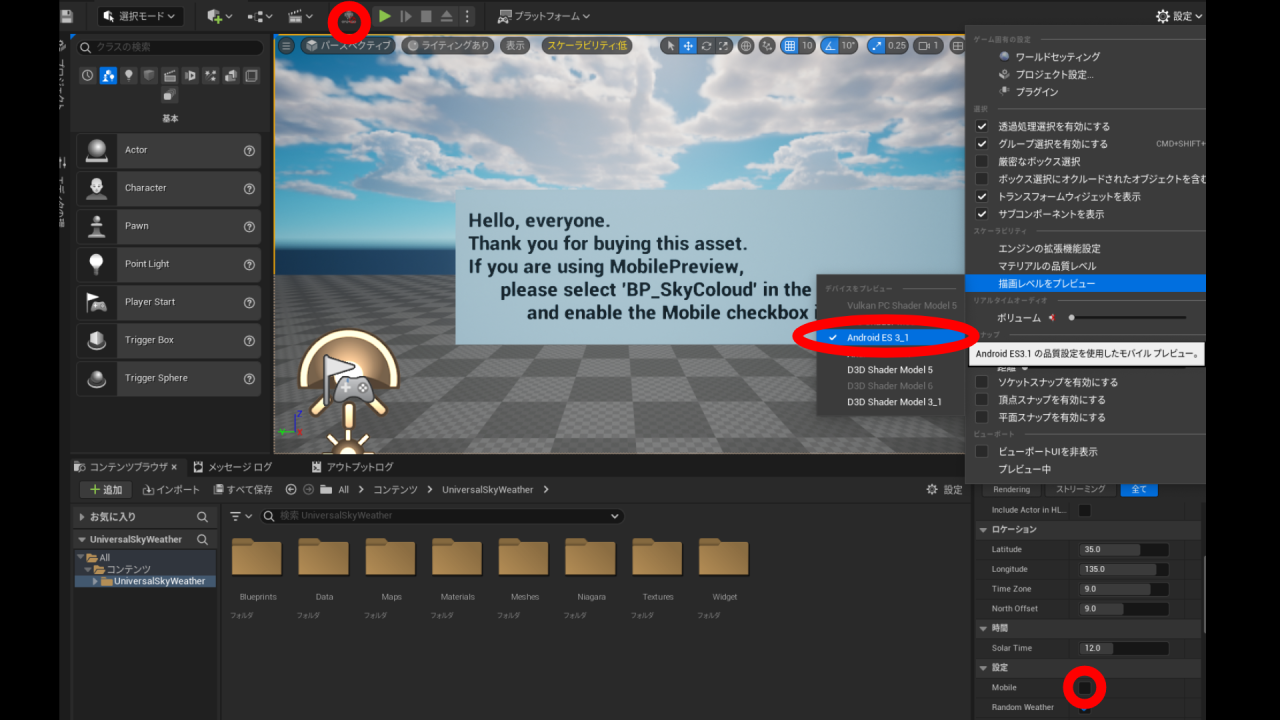
If you are using
MobilePreview,
please select 'BP_SkyColoud' in the Outliner
and enable the Mobile checkbox in the detail panel.
With the operations up to this point,
you should be able to render on MobilePreview, at least for now.
If you haven't performed this operation in the mobile development environment, the clouds won't be visible.
This will be confirmed when you package the project correctly.
Therefore, it is recommended to package the project or perform on-device debugging in your desired environment once at the startup phase.
Please refer to Use PC and Use Android for instructions on how to perform the operation.
And here, we will explain some of the custom features.
In this asset, you will primarily use a blueprint named 'BP_SkyCloud'.
First, let me explain the manipulable variables from the World Outliner's Details panel.
User
At the start of the game, it sets the in-game Year/Month/Day.
It automatically increments as days pass from the starting date.
This is configured in the 'BP_SkyCloud' Blueprint's TickGraph.
For instance, if you want to have a uniform 30 days in each month or adjust the number of days in each month, modify the 'int' value in the SelectNode inside the comment 'A system that sets and increments the end of a day, the end of a month, and the end of time.
For clarity, Option0 is not used. Option1 represents January, Option2 represents February..., and so on.
This variable represents the starting time at the beginning of the game.
It is connected to the Construction Script,
so you can smoothly proceed with your work by setting the appropriate state of the sun when creating content only for the night or only for the morning.
This variable represents the speed at which the in-game time progresses.
The smaller the value (can include decimals), the faster the progression, while a larger value will slow down the progression.
Setting it to 0 will completely stop the passage of time.
Please refer back to what was explained here initially.
If this checkbox is set to True, the weather will be randomly selected every other day from the game's start.
Please note that this won't be reflected in the Editor's viewport.
If set to False, the weather will be fixed to the selections specified in the Editor Weather Selection below.
You can set whether to perform weather updates once a day at 0:00.
Basically, this is used when the above 'Random Weather' is set to True to select a different weather randomly.
(There may be instances where the same weather is selected.)
If you want to use fixed weather, you can set it to False.
You can select several weather options from which you want to set the default weather in the viewport and the weather to be used in fixed scenarios.
Unlike in PIE (Play In Editor) mode, particles won't be generated.
Also, when 'Clear Sky' is selected, it represents a clear blue sky state without clouds at the initial setup.
Therefore, clouds won't appear during 'Clear Sky'.
Additionally, depending on the settings of the Preview Rendering Level, visibility of fog, rain, and other effects may vary or become less visible.
Please adjust these settings based on the device and specifications you intend to use.
If you want to change the contents of 'Editor Weather Selection,' such as cloud density or texture, you can access the 'Set Cloud System' function node in 'BP_SkyCloud' and manipulate the variables corresponding to each weather.